Booking Calendar
The Booking Calendar can be found from the first button on the top navigation ribbon, also under Shortcuts on the Dashboard as 'Booking'. You can manage personal appointments with clients, and build calendars for different venues and services using the booking calendar. You can add clients to events or they can book events themselves. Events can be limited to a maximum number of attendees, with an optional queuing feature. Your booking calendar's visibility is entirely customizable by client and group.
Video Tutorial
This is a comprehensive video tutorial of all the features of the Booking Calendar. Alternatively, follow the instructions below for the same information.
The booking calendar can be found from the first button on the top navigation ribbon, also under Shortcuts on the Dashboard as 'Booking'.

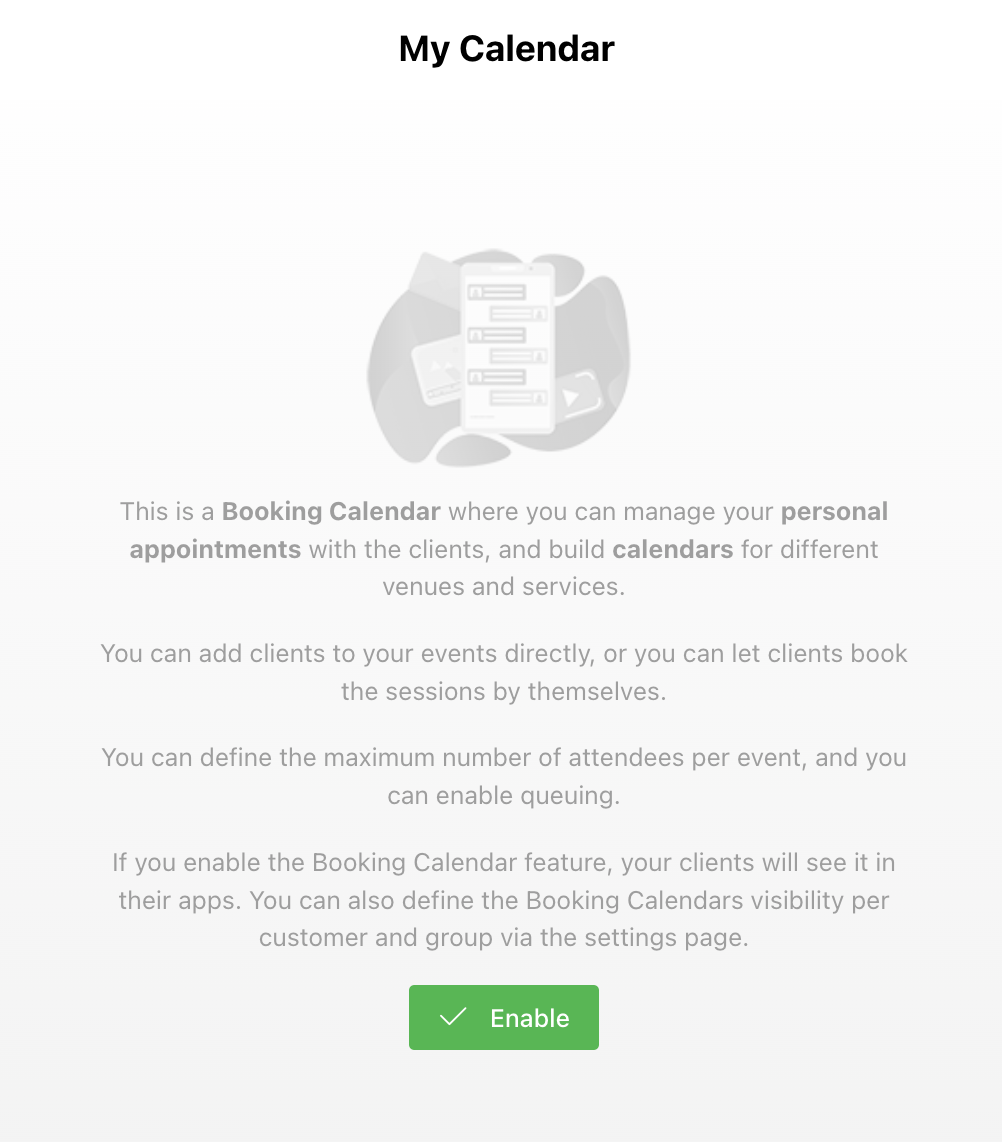
When you access the Calendar for the first time, you will need to enable it. After doing so, clients will have access to your calendar and its booking features unless visibility has been separately restricted.
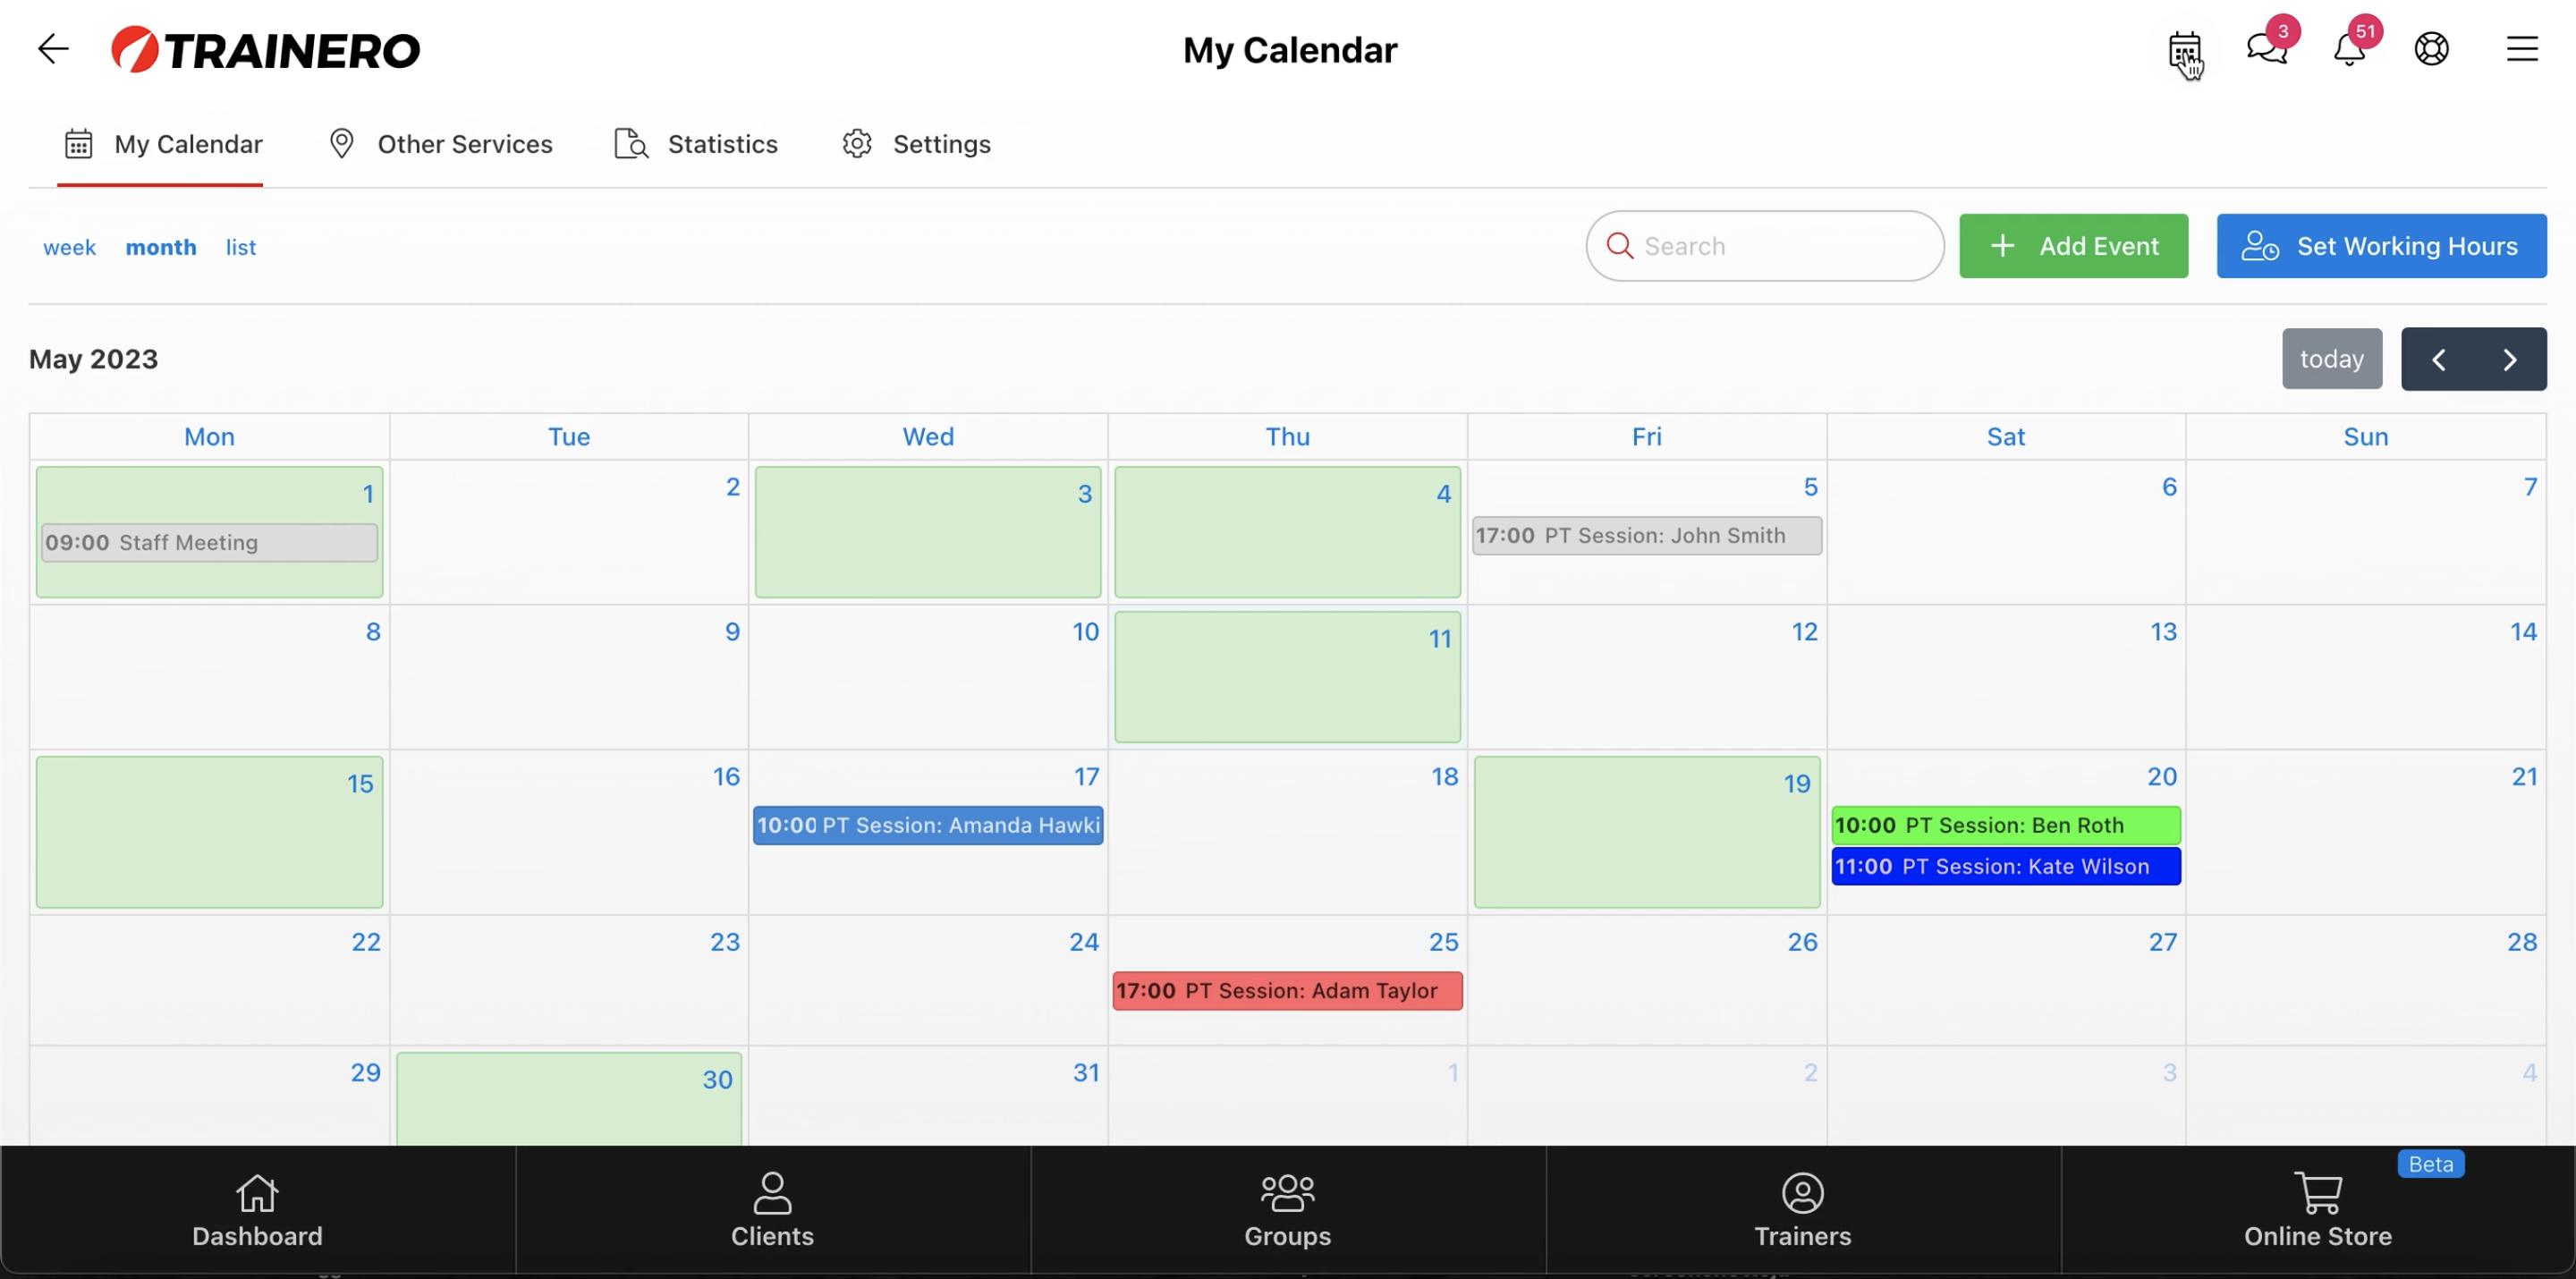
Use the buttons 'week', 'month', and 'list' to toggle between calendar formats. The booking calendar allows you to add individual events represented by the thinner colorful rectangles. You can set your working hours represented by the days highlighted in green. Working hours help inform your clients when you are bookable and reachable.
Booking Calendar Events
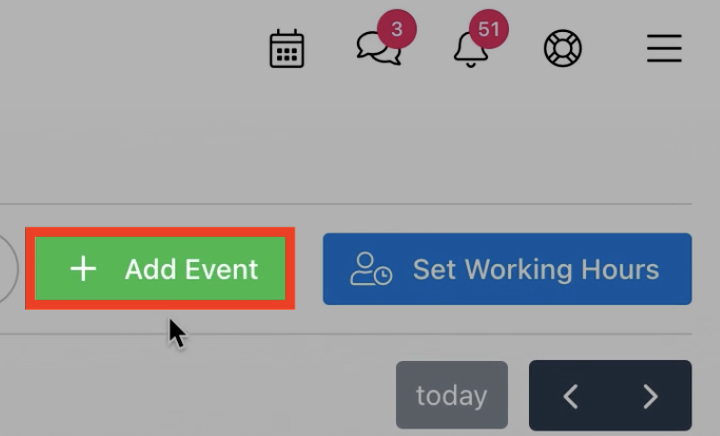
Select 'Add Event' to begin creating a new single event.
Select 'Create New Event' to begin building an event from scratch. Alternatively, you can select an existing template saved from a previous event creation iteration below.

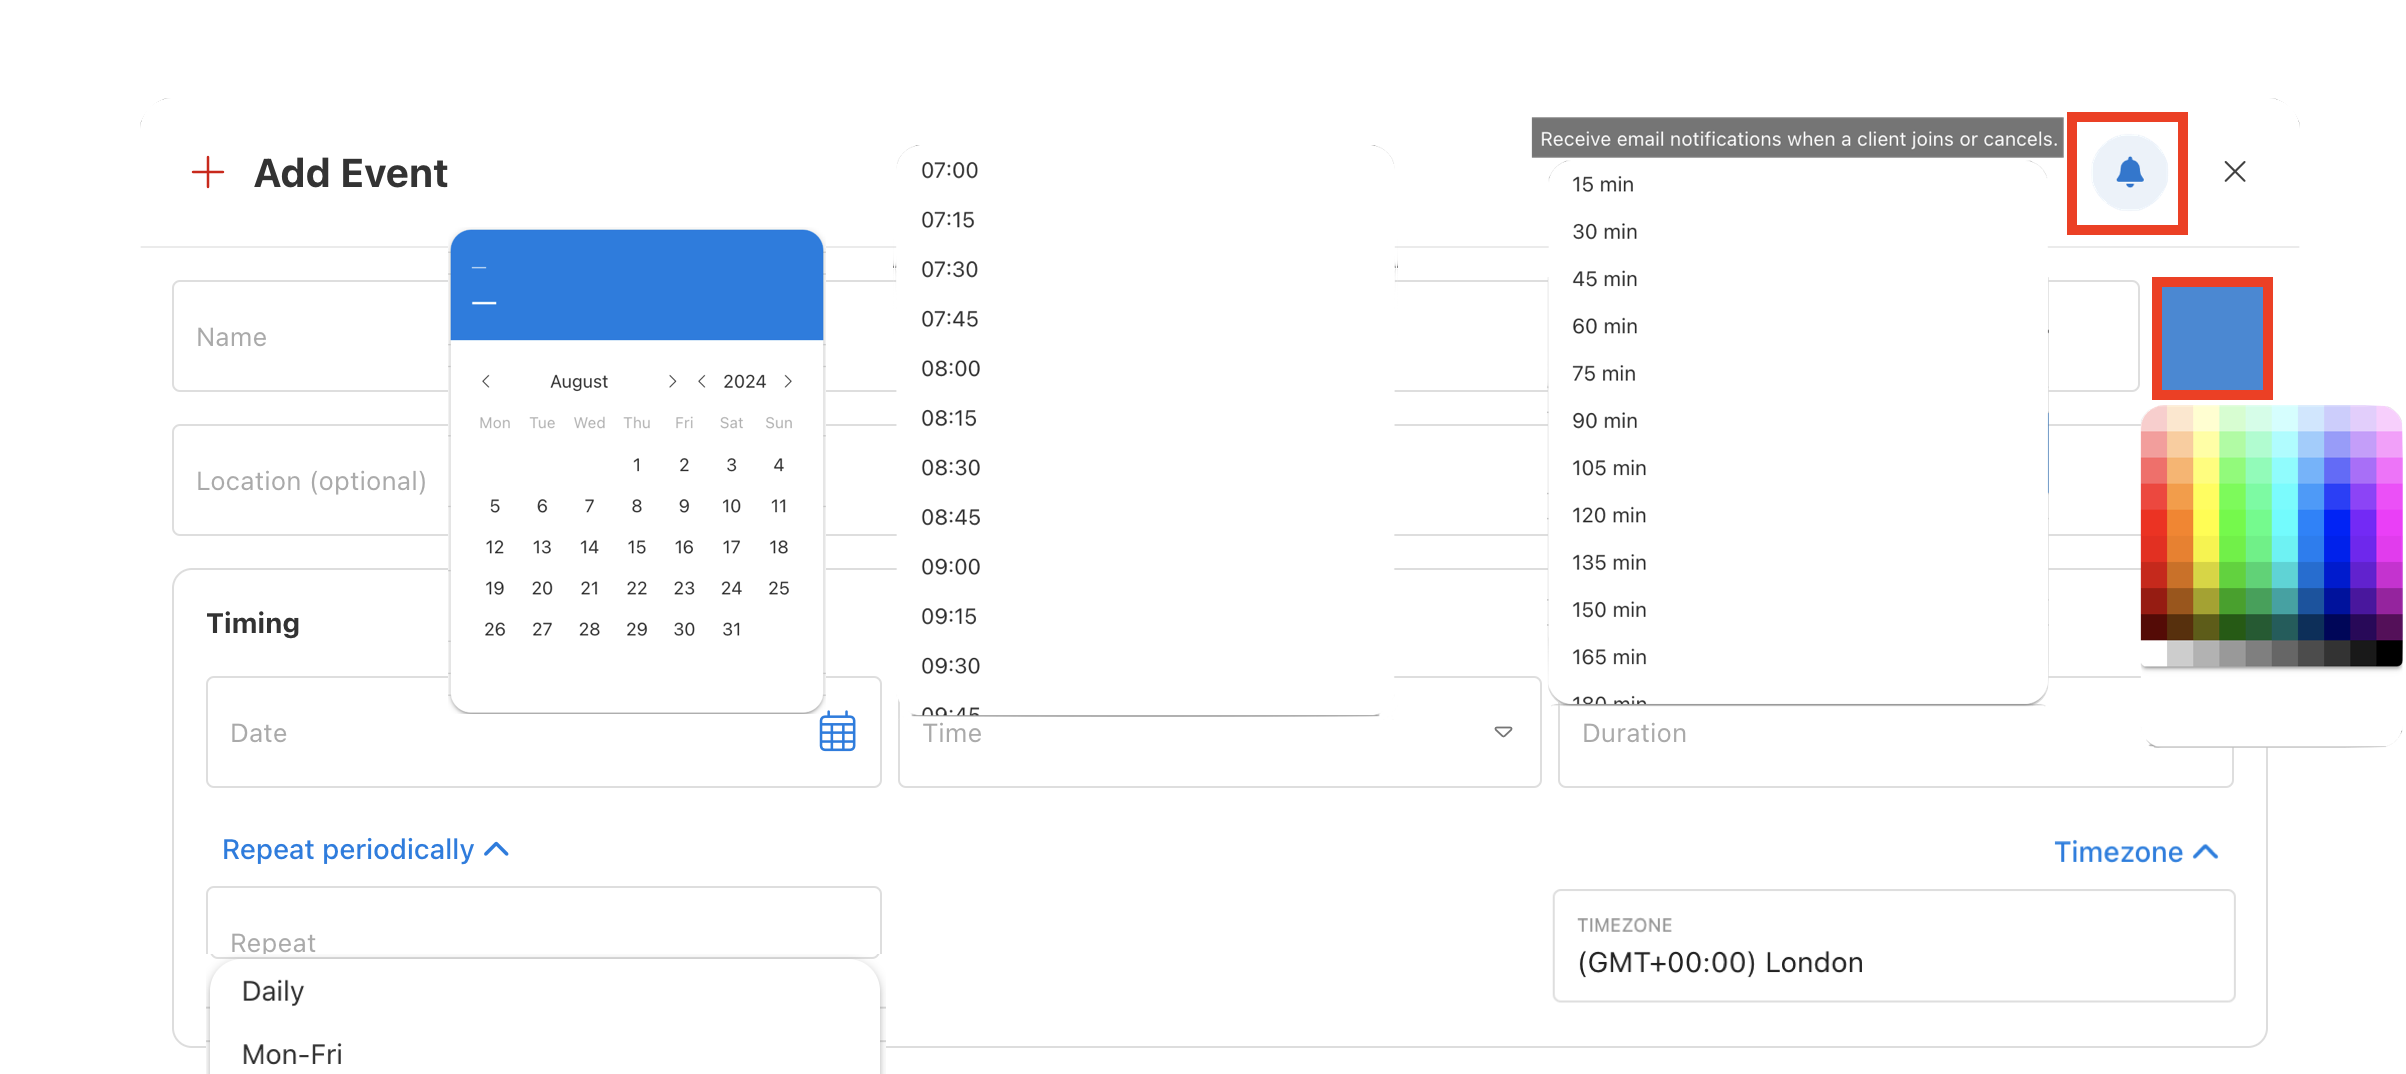
- Give your event a name.
- Optionally, set a location for the event.
- Assign a color for the event to be displayed as in the calendar.
- By default, the notifications are turned on and you will receive all push notifications related to this event. It is recommended to keep notifications turned on.
- Select a date for the event.
- Select a time of day for the event.
- Set a duration for the event.
- You can schedule repetitions of the event by expanding 'Repeat periodically'.
- You can set a timezone for the event. Calendar events are automatically adjusted to the client's or trainer's timezone according to their application settings.
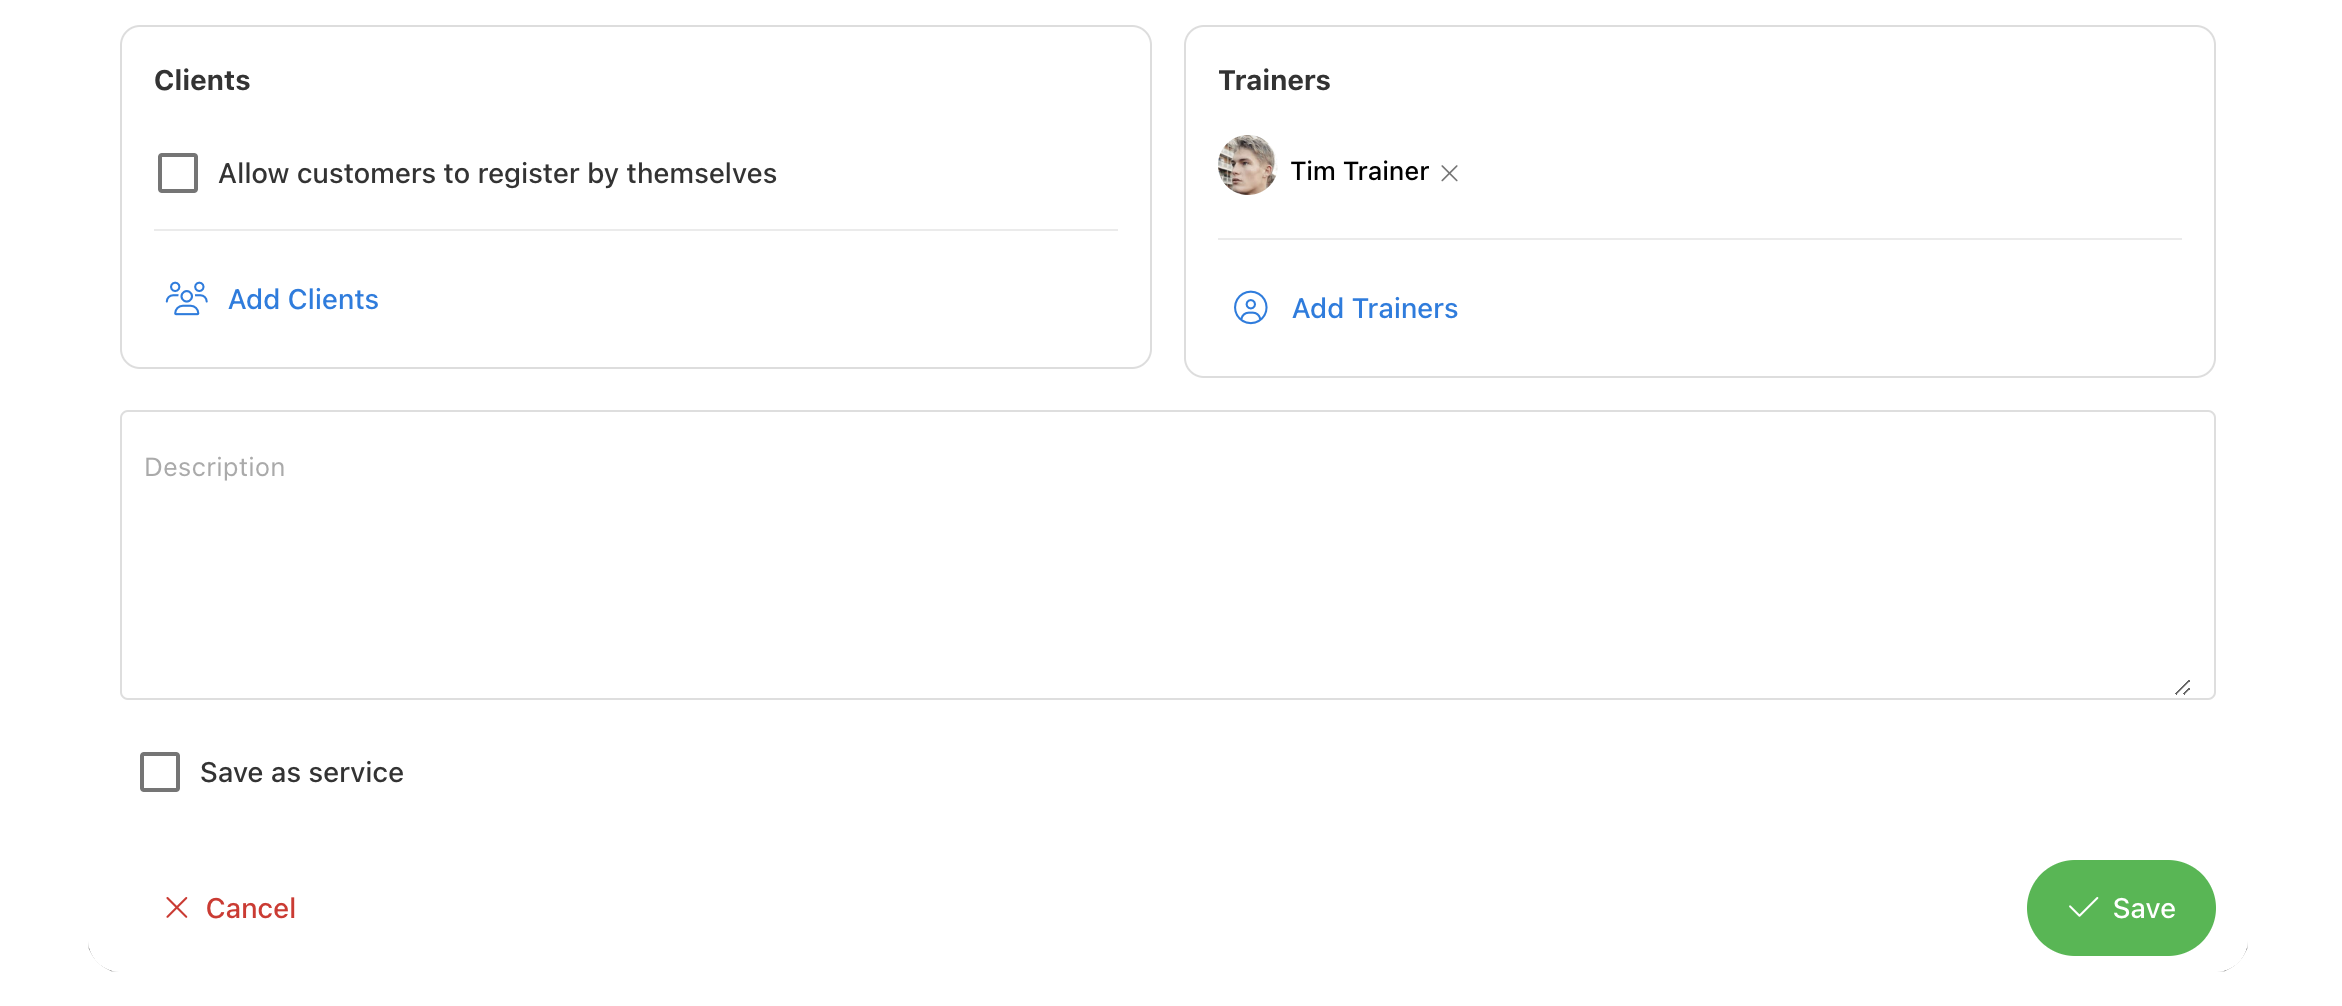
- Select 'Add Clients' to search for clients by name and add them to the event.
- Select 'Allow customer to register by themselves' to open the event for clients to sign up individually. In doing so, you can set a maximum number of participants, and optionally you can enable queuing for the event on a first come first serve basis.
- Select 'Add Trainers' to search for trainers by name and add them to the event.
- Give the event a description to inform participants of the details.
- Select 'Save as service' to save the event as a template under My Services in the event builder.
- Remember to 'Save'!
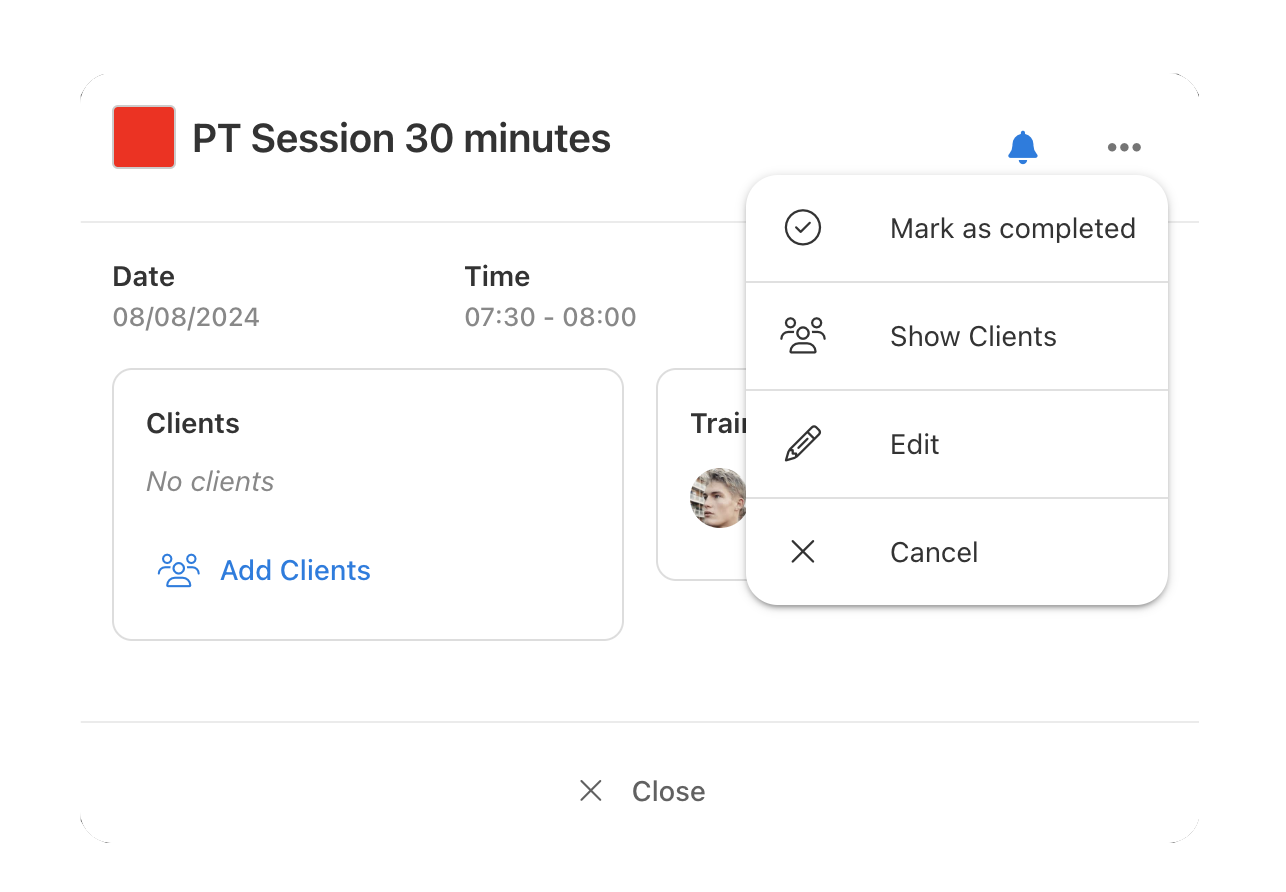
- Selecting an event in the calendar expands it into a popup window.
- Here you can mark the event as completed, show the list of participating clients, edit any details and specifications of the event, and add clients and trainers.
- Select 'Cancel' if you wish to cancel an event. After you have canceled an event, you can delete it from the calendar.
Setting Working Hours
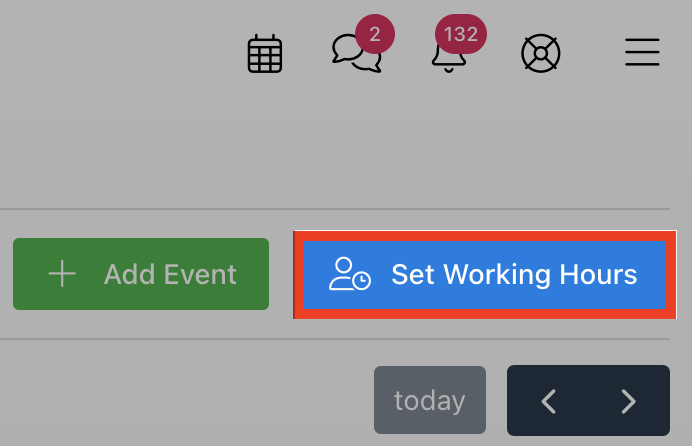
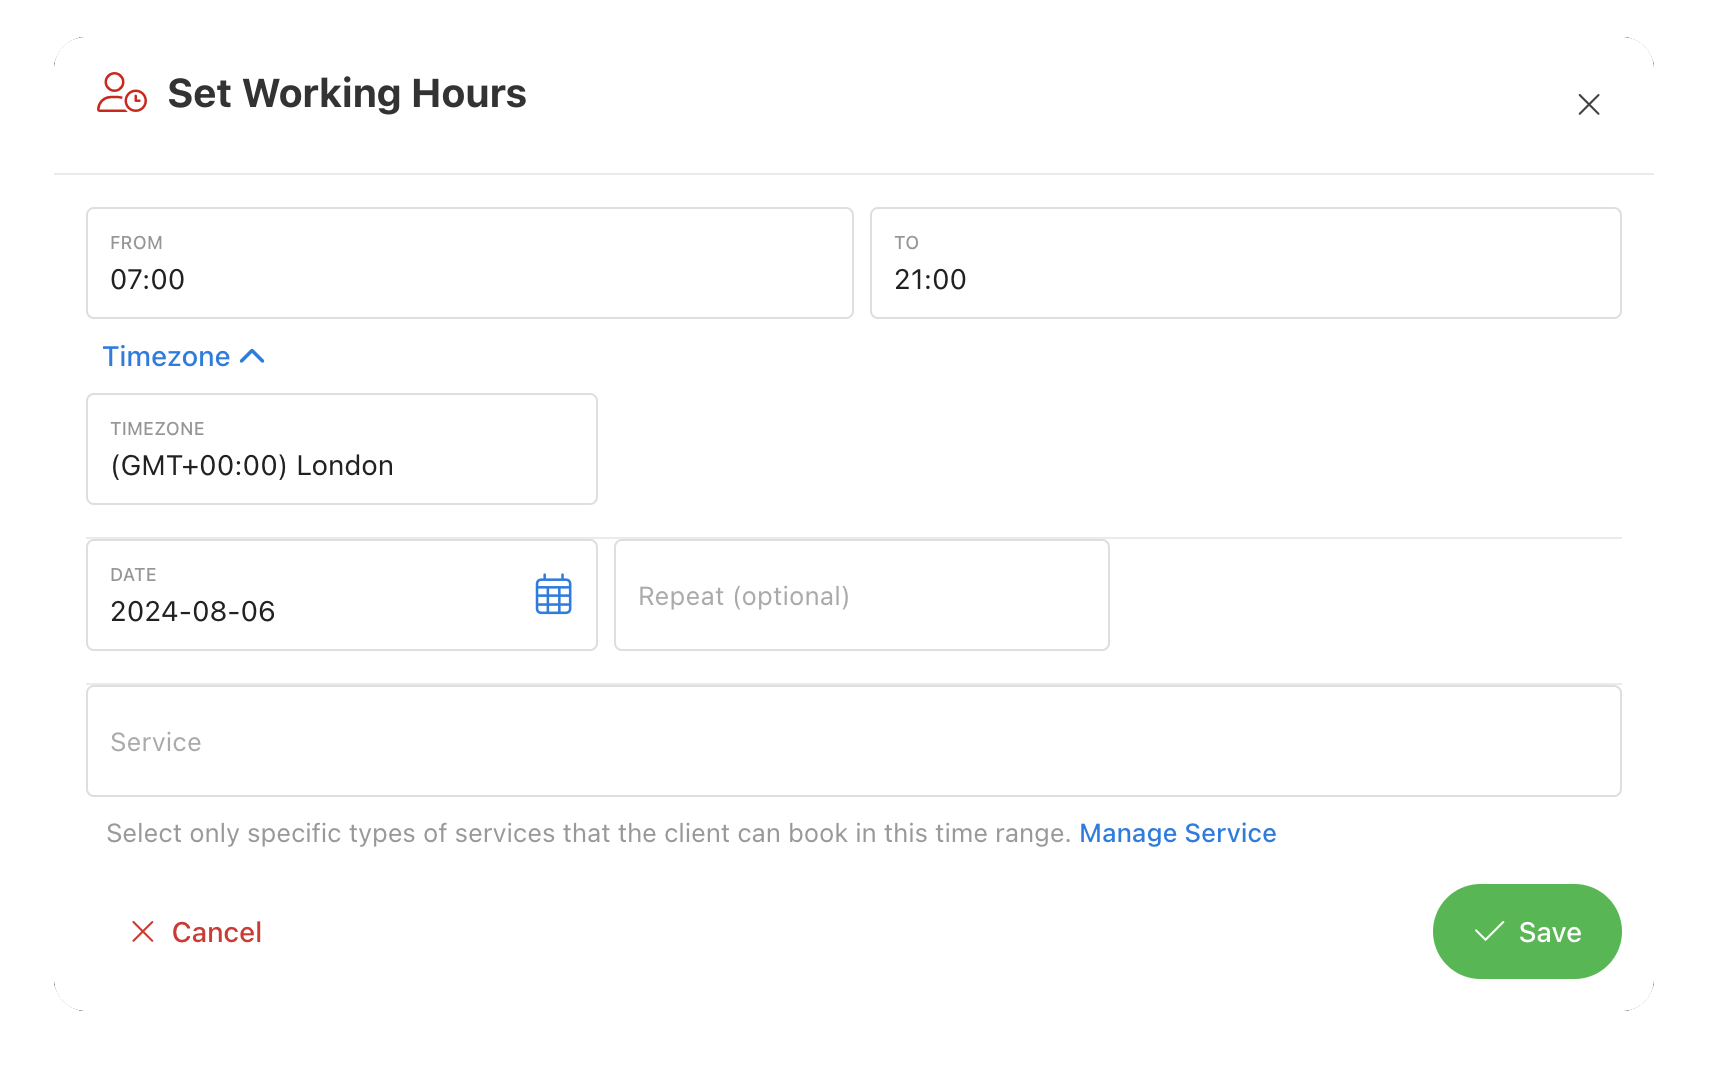
Select 'Set Working Hours' to create visibility in your calendar for clients and trainers about your availability. After you have set working hours, clients will be able to book sessions directly by themselves in your calendar.
A popup window of all your old working hour sessions shows up as a list.

Scroll to the bottom and select 'Add New' to begin editing a new working hour session into your calendar.

- Set a starting time and an ending for your continuous window of availability.
- Adjust the timezone as necessary. It will automatically adjust for clients' according to their application settings.
- Select a date to apply the working hours to.
- Repeat the schedule of working hours is optional: daily, Mon-Fri, every other day, weekly, monthly.
- Select one or more services from the dropdown list to enable clients to make bookings of varying durations.
- Remember to 'Save'!
Other Services: Booking Venues
The 'Other Services' tab within the calendar enables the creation of separate booking calendars for individual events and venues/locations. Any new calendars you create are visible to your entire team of trainers, which can be used to manage location bookings and check the availability of any custom spaces or events that your team shares.
Navigate to the 'Other Services' tab in the calendar. Select a calendar from the dropdown list to start viewing and editing that specific booking calendar. Select 'Add Event' in an identical manner as explained under the Booking Calendar Events section above to specify bookings for that certain calendar subject on a specific date and time.

Select 'Edit' next to the dropdown list of existing booking calendars to preview all of your calendars.

Select 'New Calendar' to begin creating a new shared booking calendar.
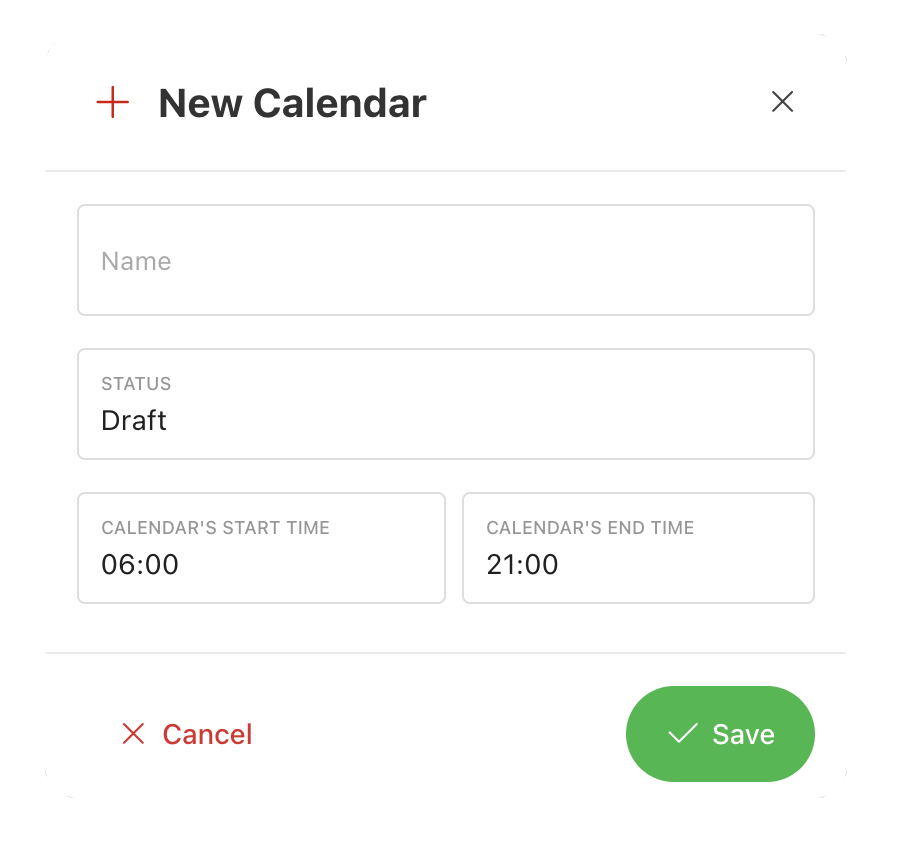
Give your calendar a name. Select whether to save as 'Draft' or directly 'Publish' the calendar. Set a starting and ending time for your calendar by hours. Select 'Save', now a new booking calendar will be created and added to the list of calendars in Other Services.
Calendar Statistics
The 'Statistics' tab can be found third from the left after the 'Other Services' tab inside the calendar. Statistics allows you to view all of the historical bookings of any trainer.
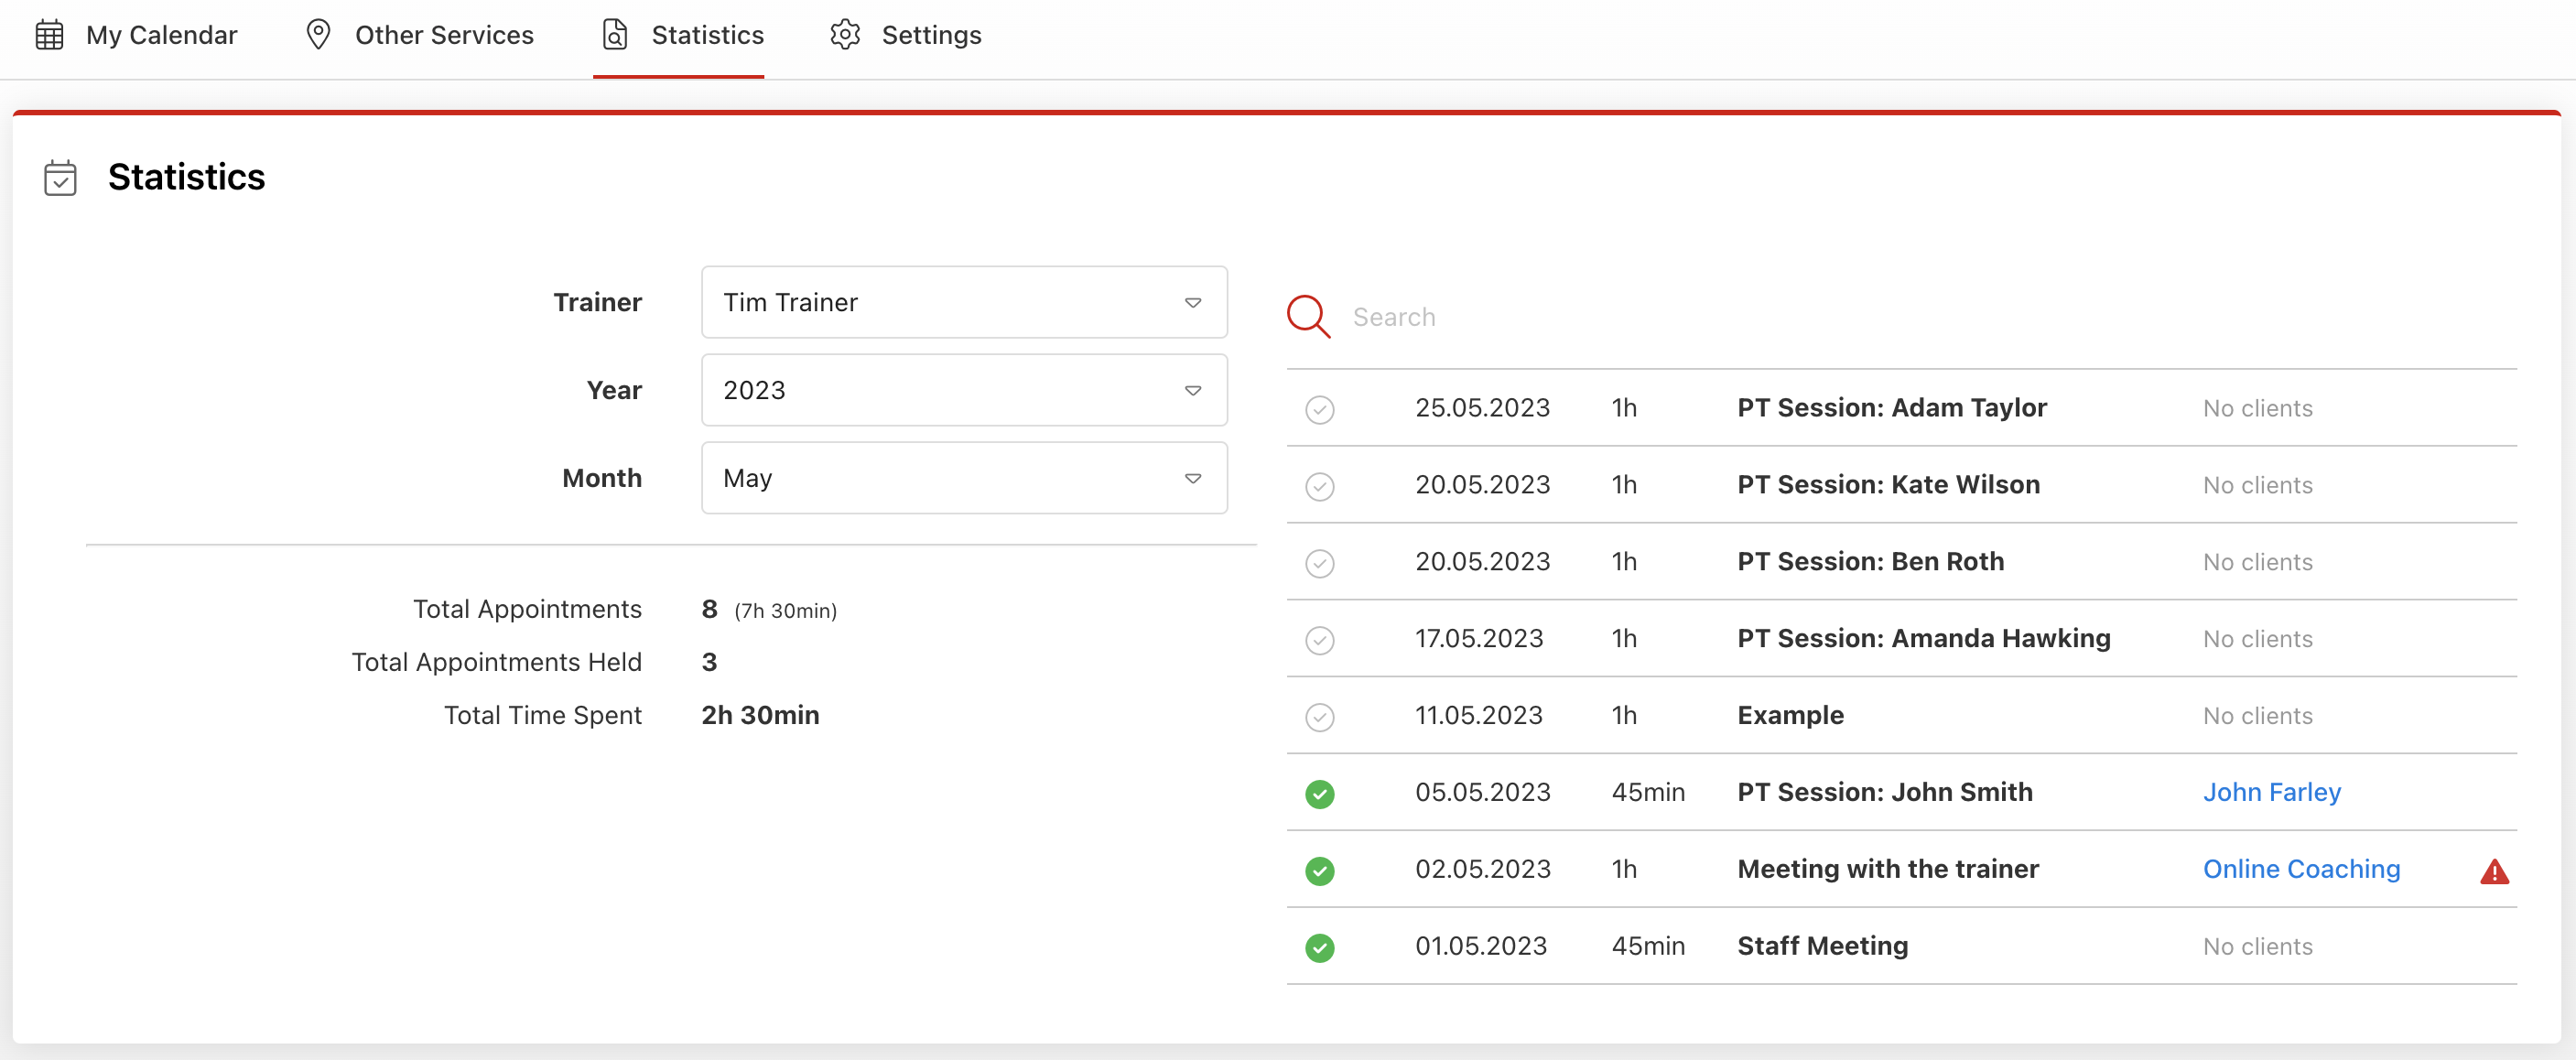
- Select a trainer you wish to analyze from the dropdown list 'Trainer'.
- Select the specific year and month you wish to analyze under 'Year' and 'Month'.
- A summary will populate underneath the modifiable variables.
- The specific individual bookings will populate as a searchable list on the right.
Calendar Settings
Calendar settings can be found from the last tab 'Settings'. The first component of settings is 'My Services'. Use 'My Services' to create preset bookable services or sessions of varying duration. These services and sessions can then be applied directly as a template when creating an event, making the process rapid. Alternatively, these services can be applied to working hours as blocks of varying duration that a client can individually book from your calendar.

You can choose customizable calendar styles.

Adjust your booking calendars earliest and latest available times for booking across any given day. Further customizability is found below in the form of maximum booking quantities per customer, and length in advance for when bookings can be made.

You can enable a daily summary of appointment statistics, which is served via email. This is the same information that you can find manually under the 'Statistics' tab, however, enabling this automated email will lessen your workload and achieve the same goal.

You have further customizability in the form of renaming the terminology that is used for 'Trainers' and for 'Other Services' when making bookings with the calendar from the client's perspective.

Set Calendar Visibility
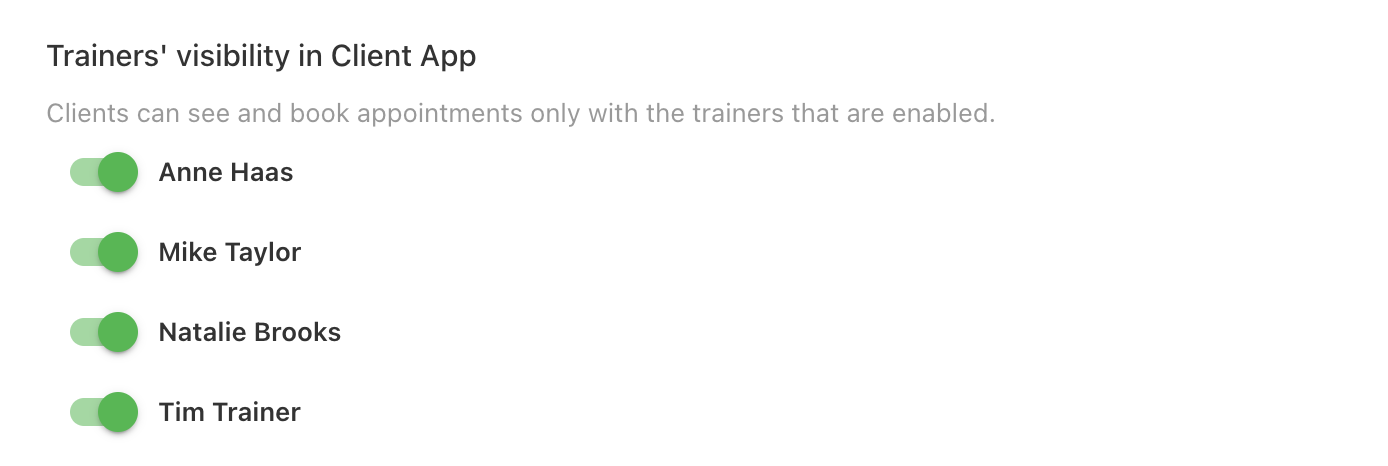
Finally, you can adjust and customize the visibility of your booking calendar amongst your clients. You can also choose to make your other trainers' calendars visible to your clients allowing the client to make identical bookings with other trainers as well.
You will see a list of all your trainers. Toggle on any trainers you want clients to have full visibility.
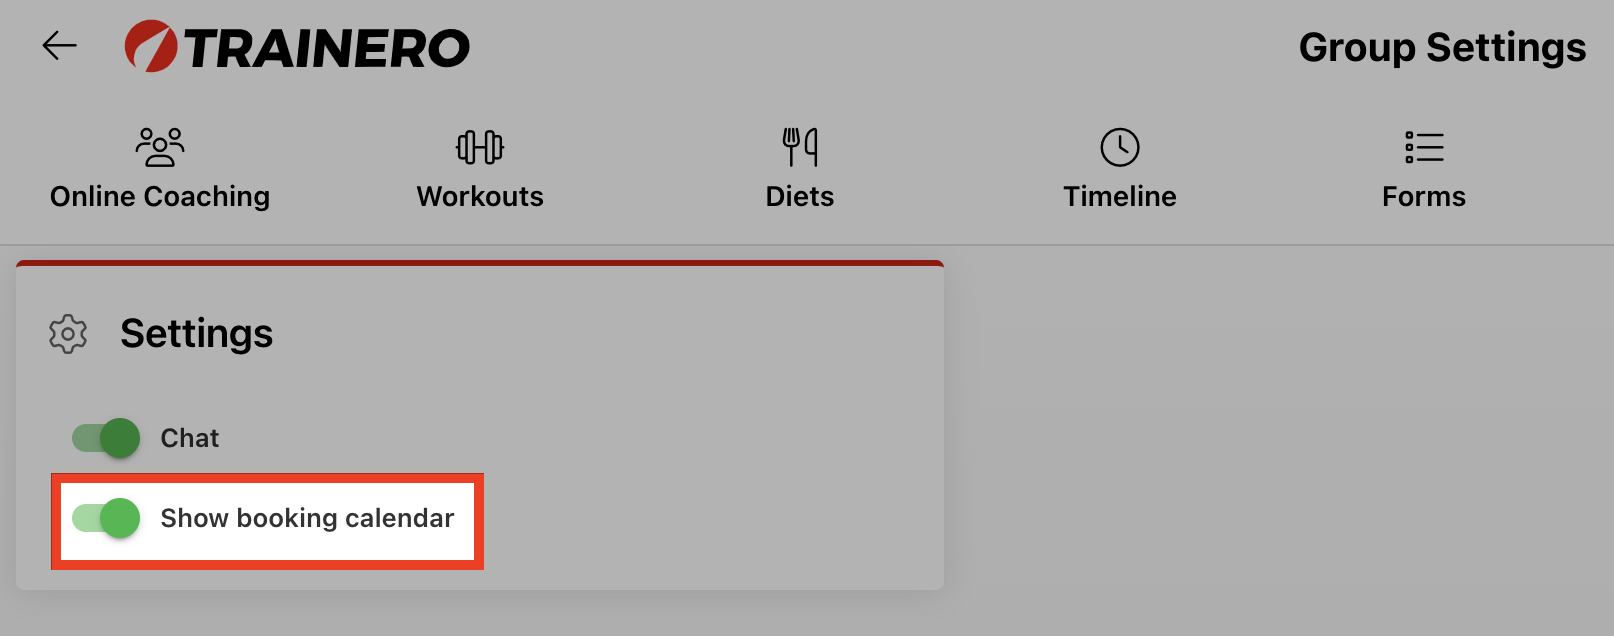
You can make your booking calendar visible to all clients with no exceptions. You can also make your booking calendar visible only to selected clients and groups.
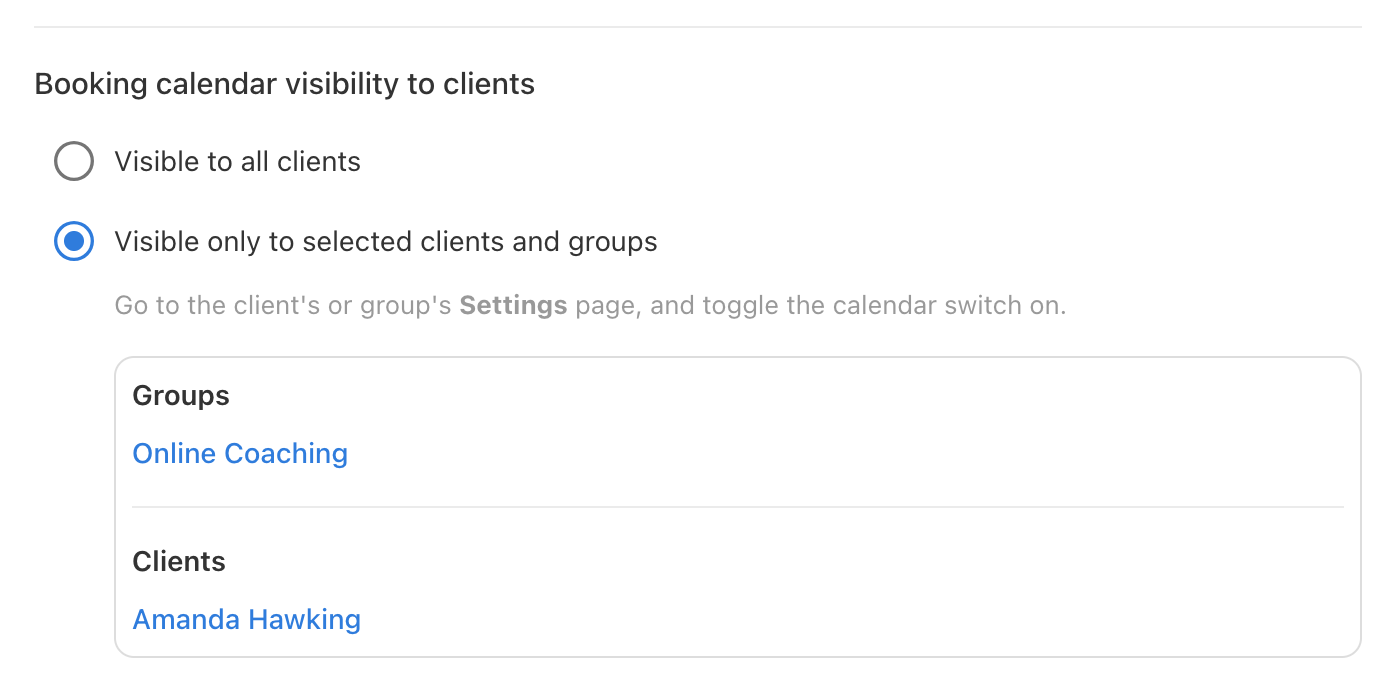
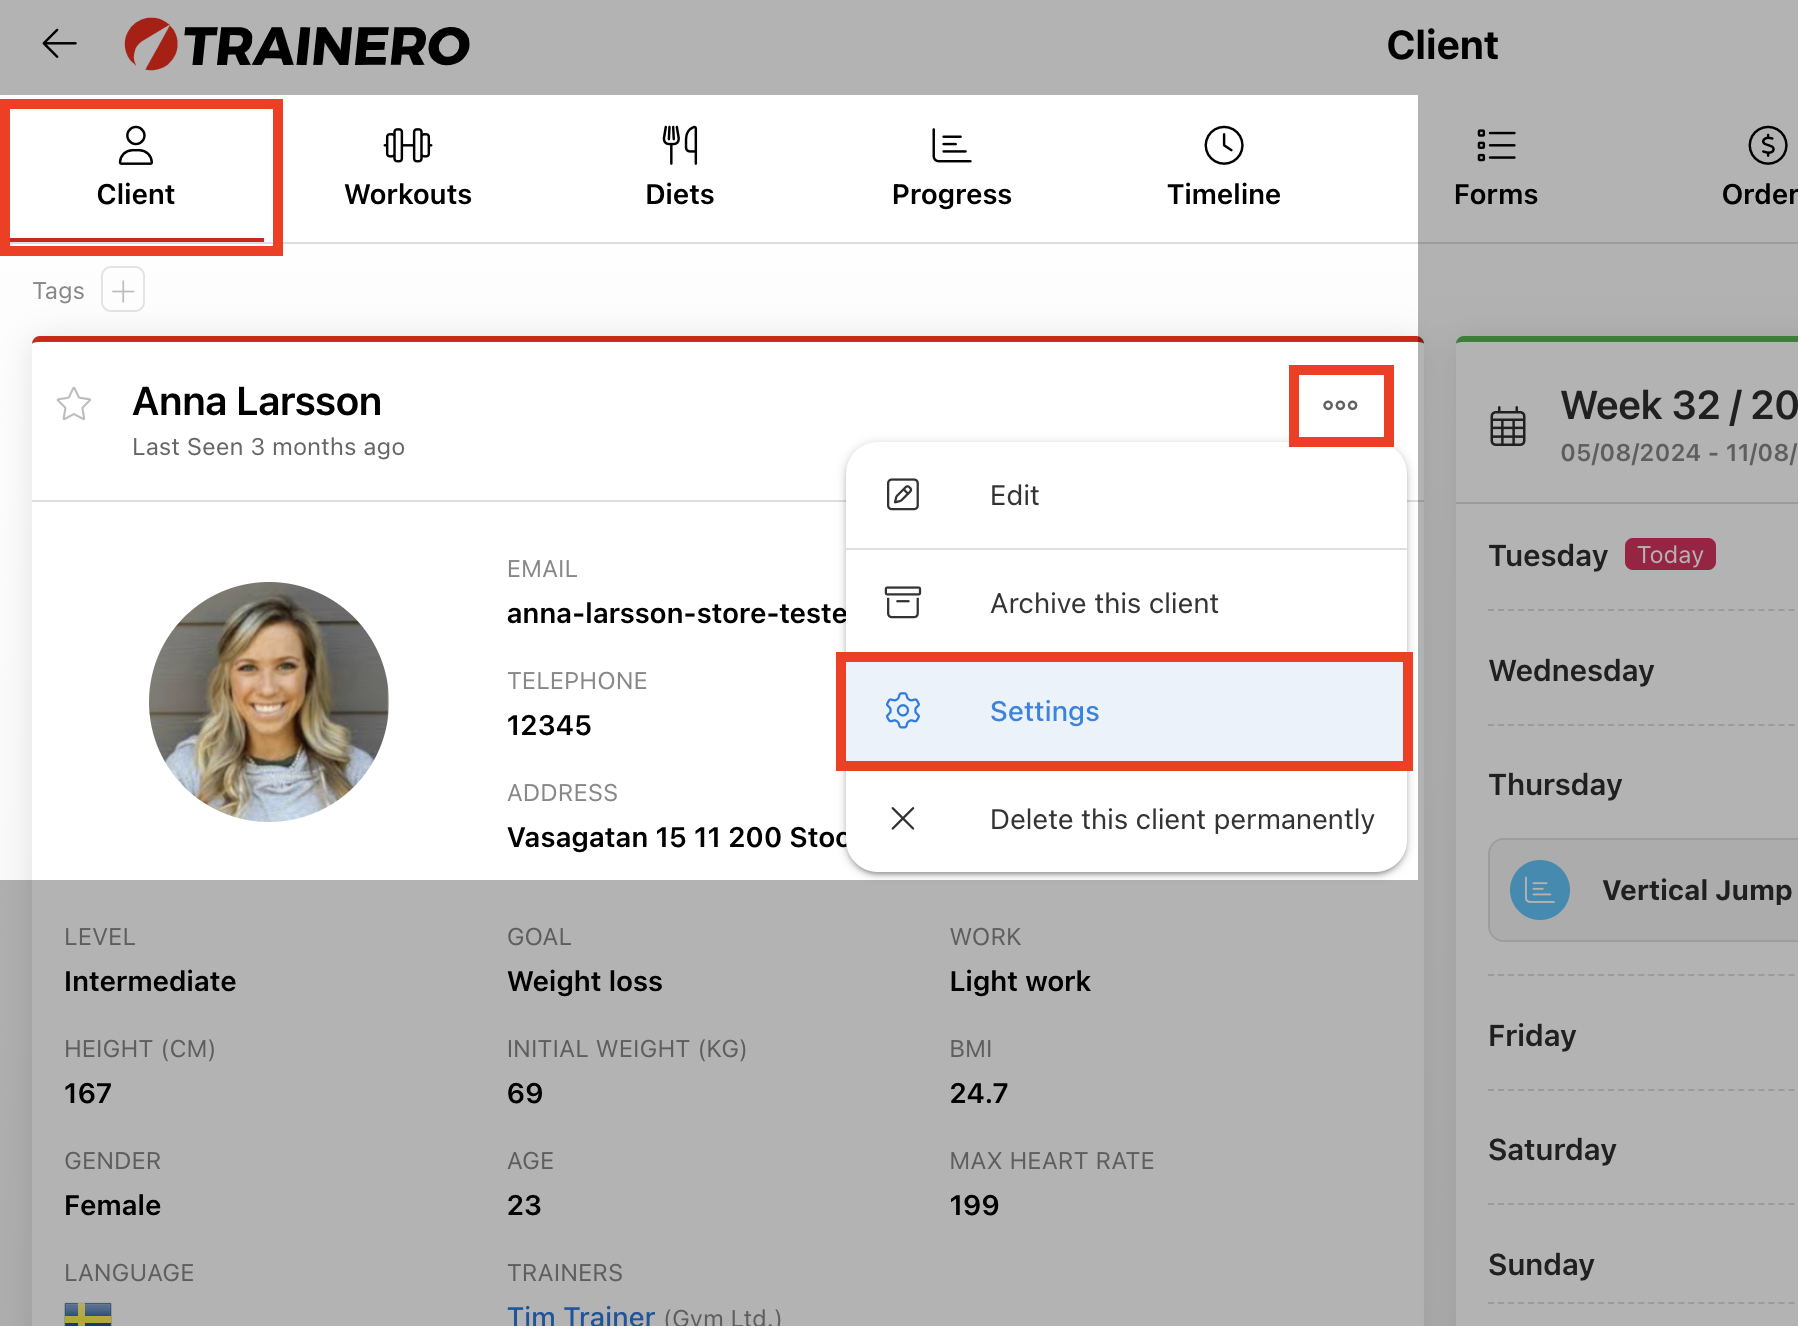
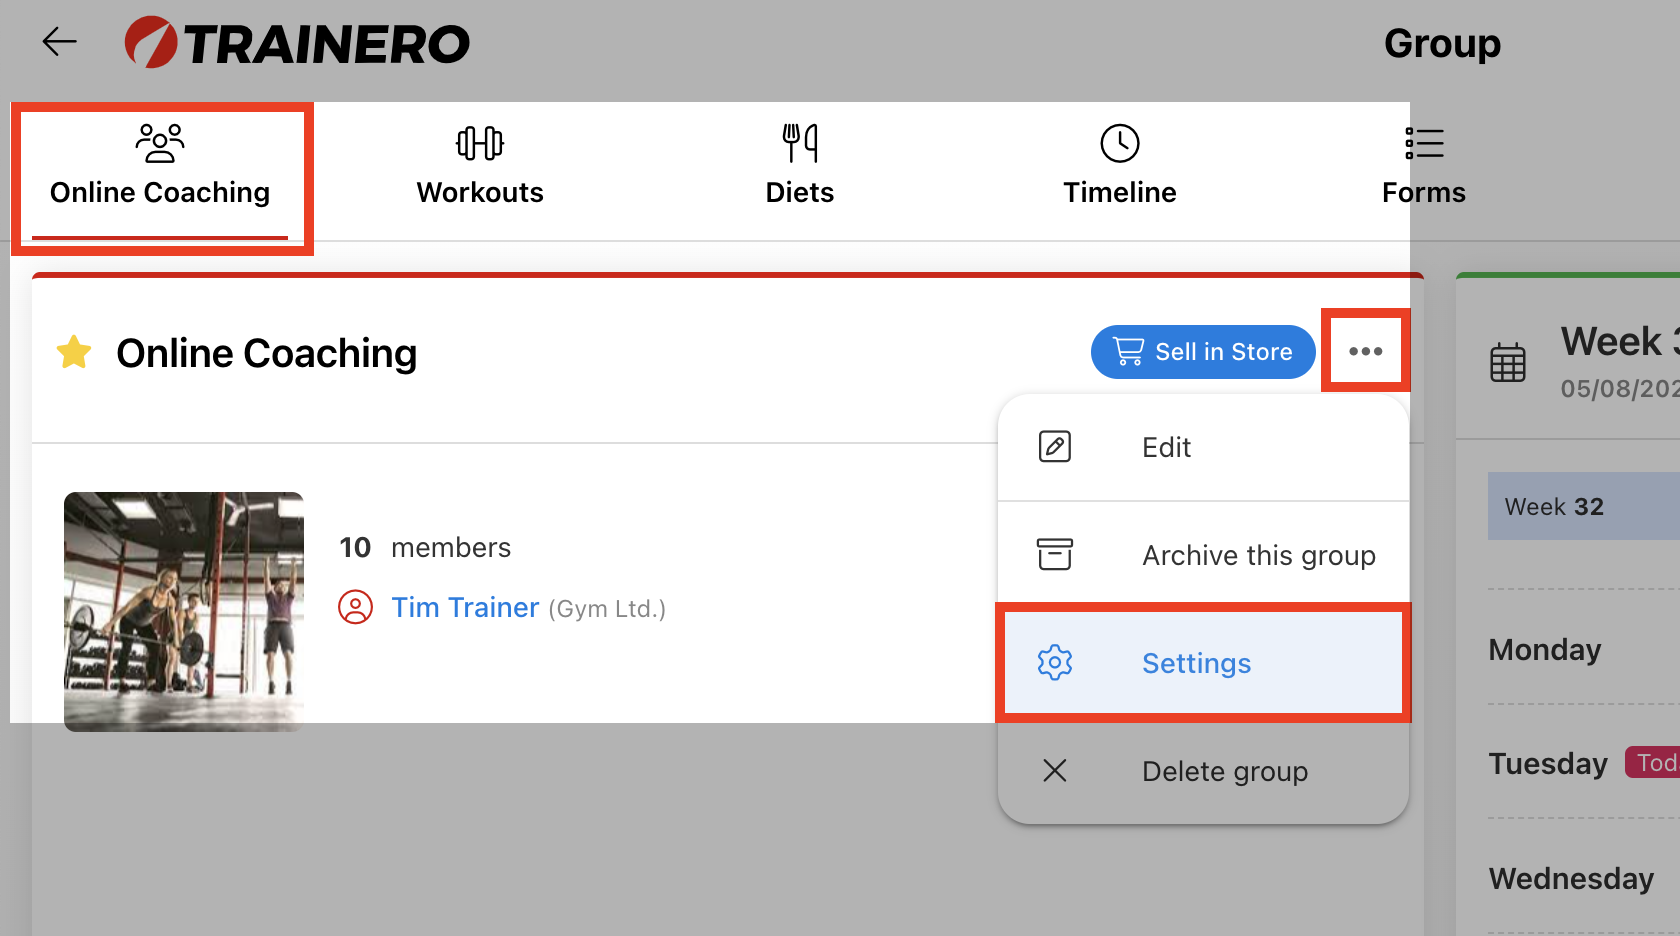
To toggle on the visibility of your booking calendar for a selected client or group, navigate to the clients or groups settings page.
Client:
Group:
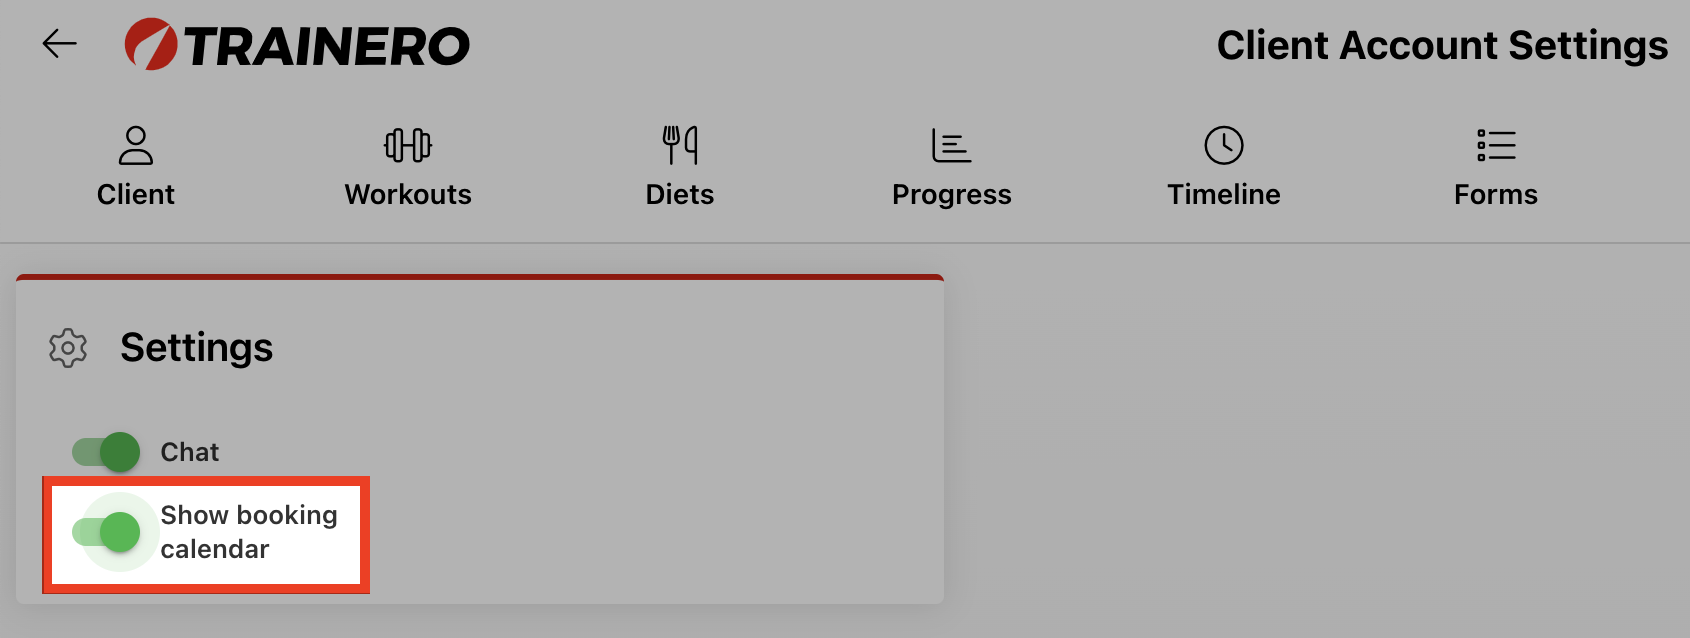
Finally, toggle on the booking calendar.
Client:
Group:
